SPCC Works - Transaction Allocation & Sign Off
Navigate to https://payment2.works.com/works/home
Click on "Expenses"
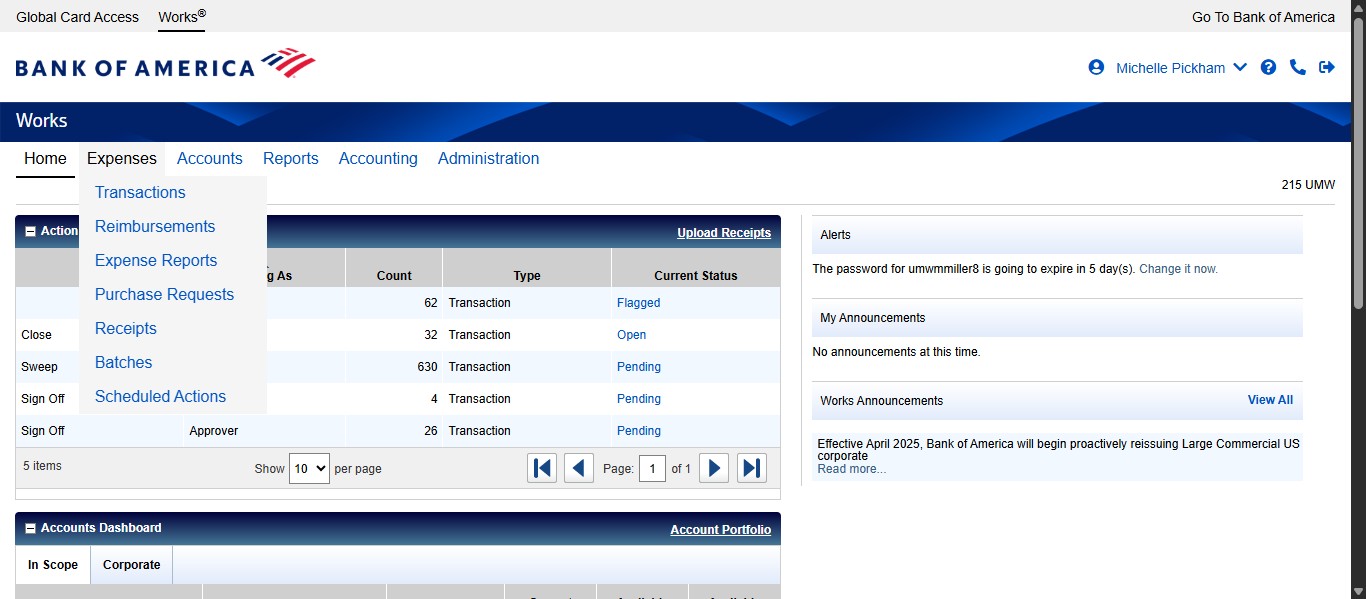
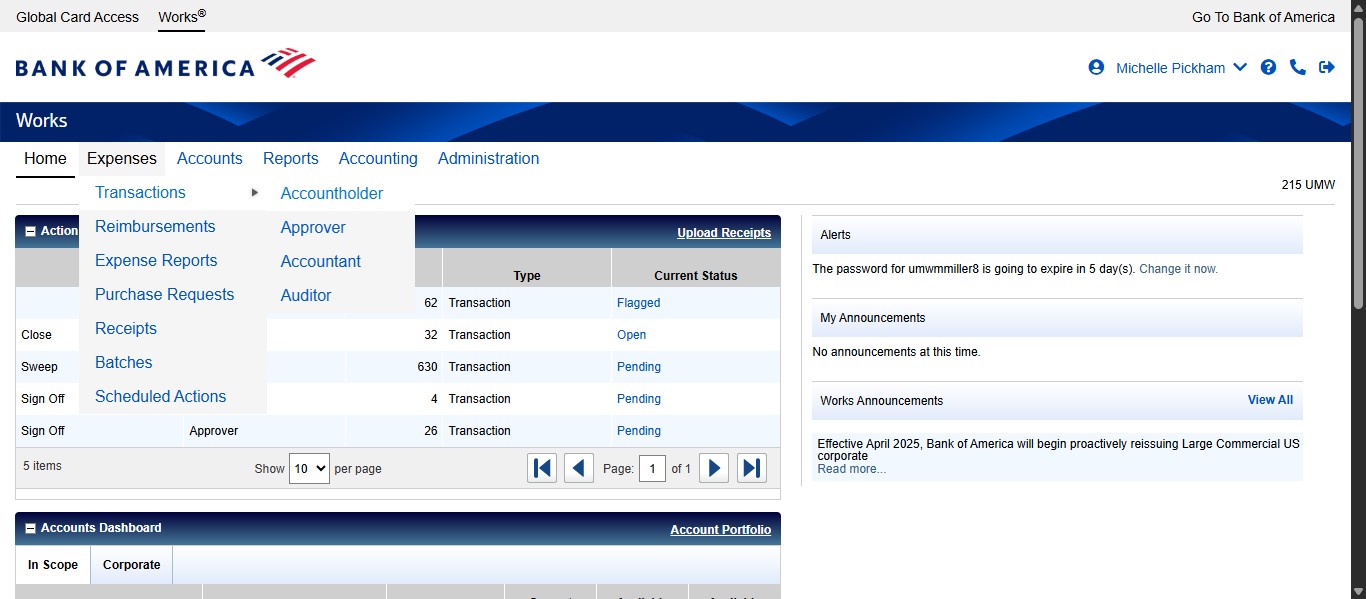
Click on "Transactions"

Click on "Accountholder"
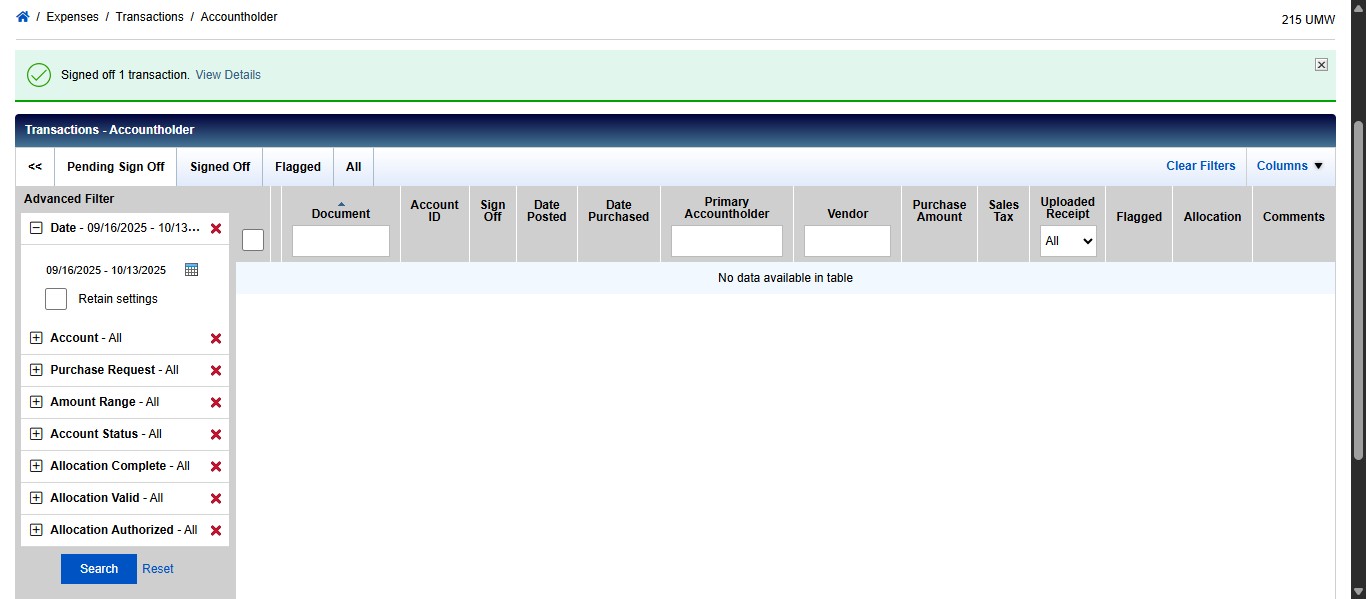
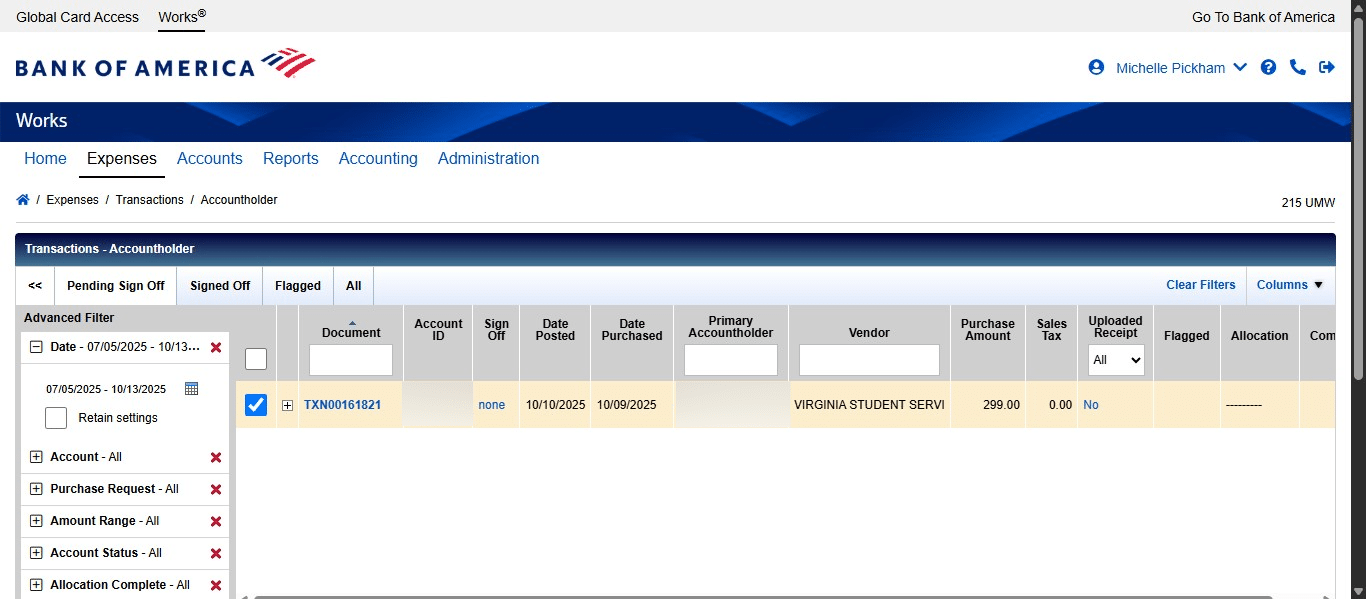
Edit your date range in the Pending Sign Off tab to the appropriate date range. To edit the date, click on the date filter.
Click on the calendar icon.
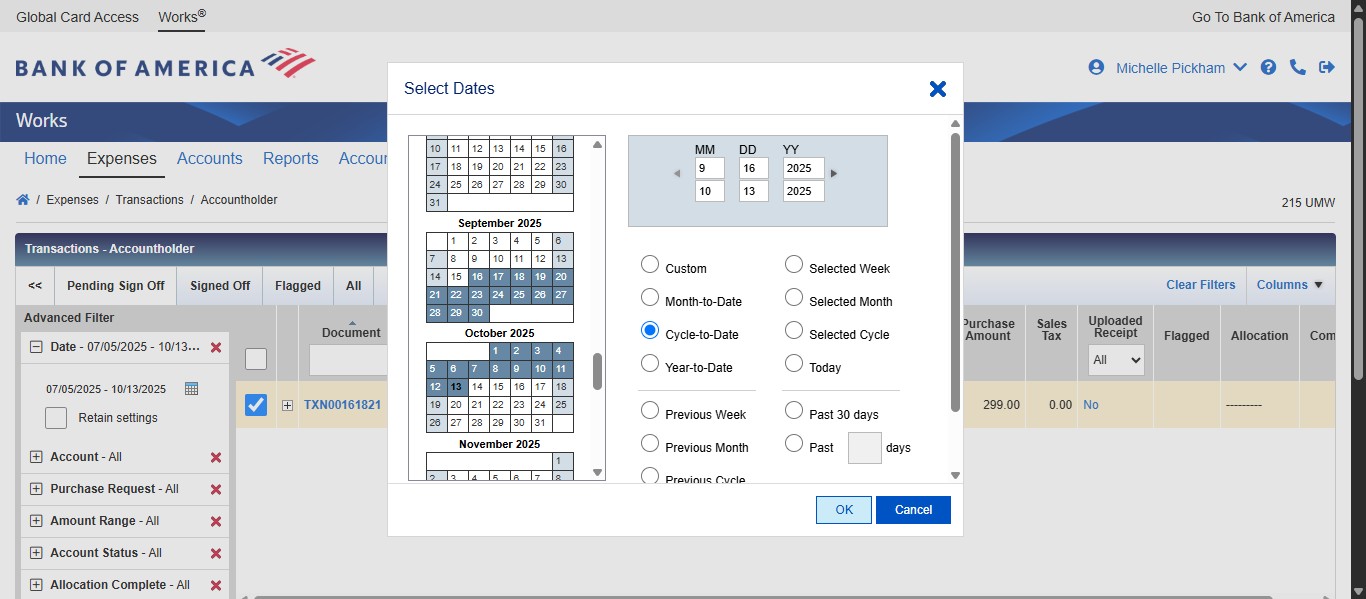
If you want to see the transactions only for the current billing cycle, select Cycle to Date and click on "OK"
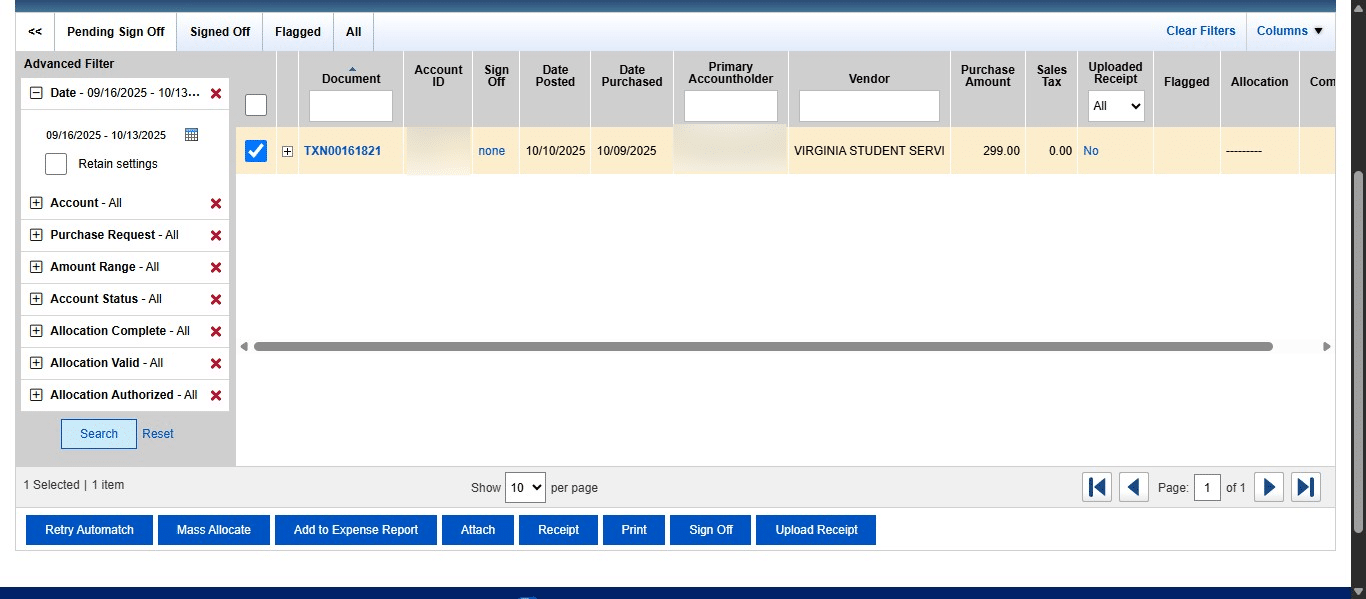
Then click Search to apply the new filtered date range.
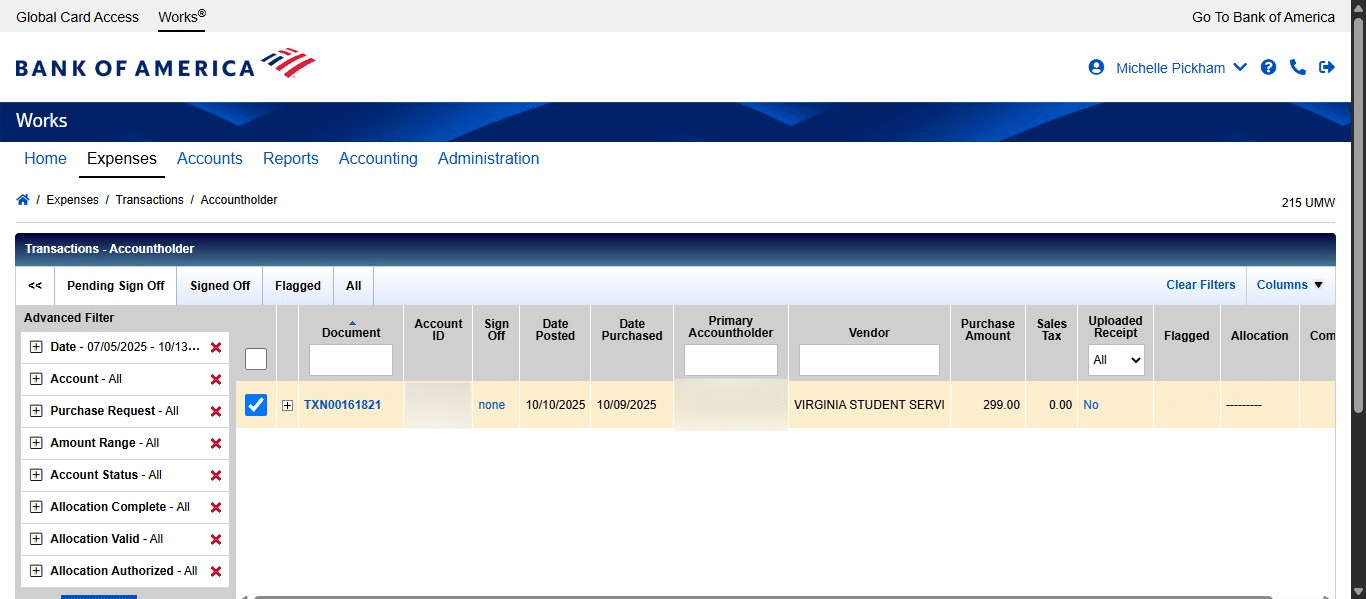
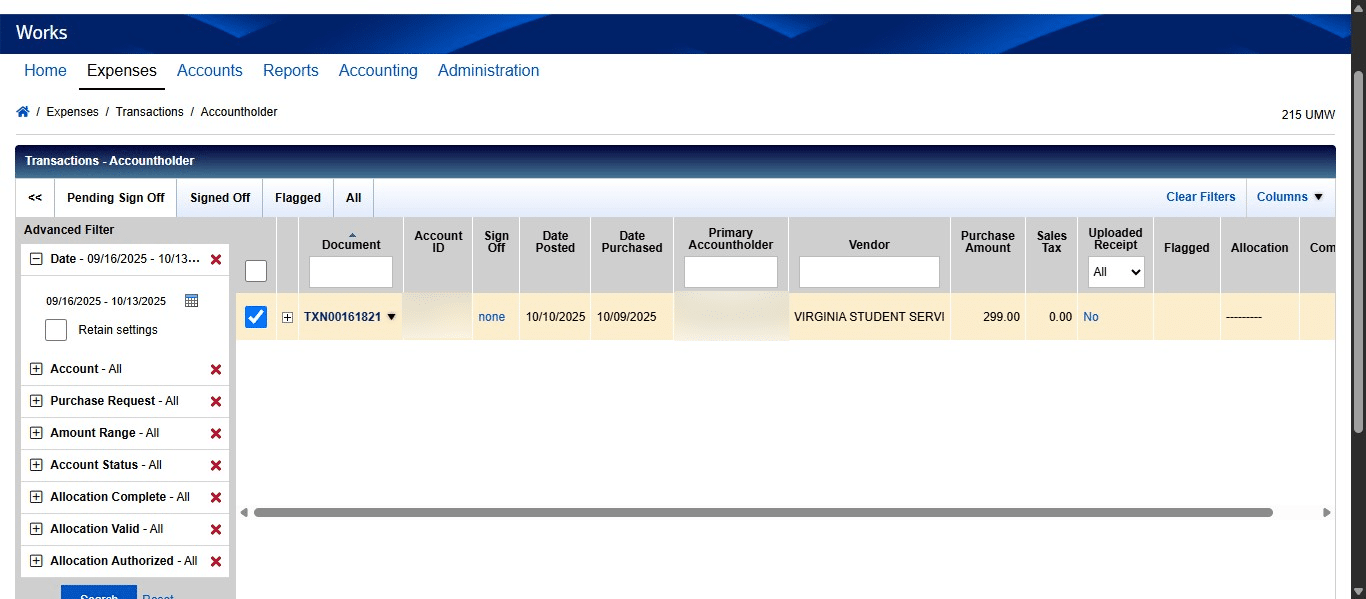
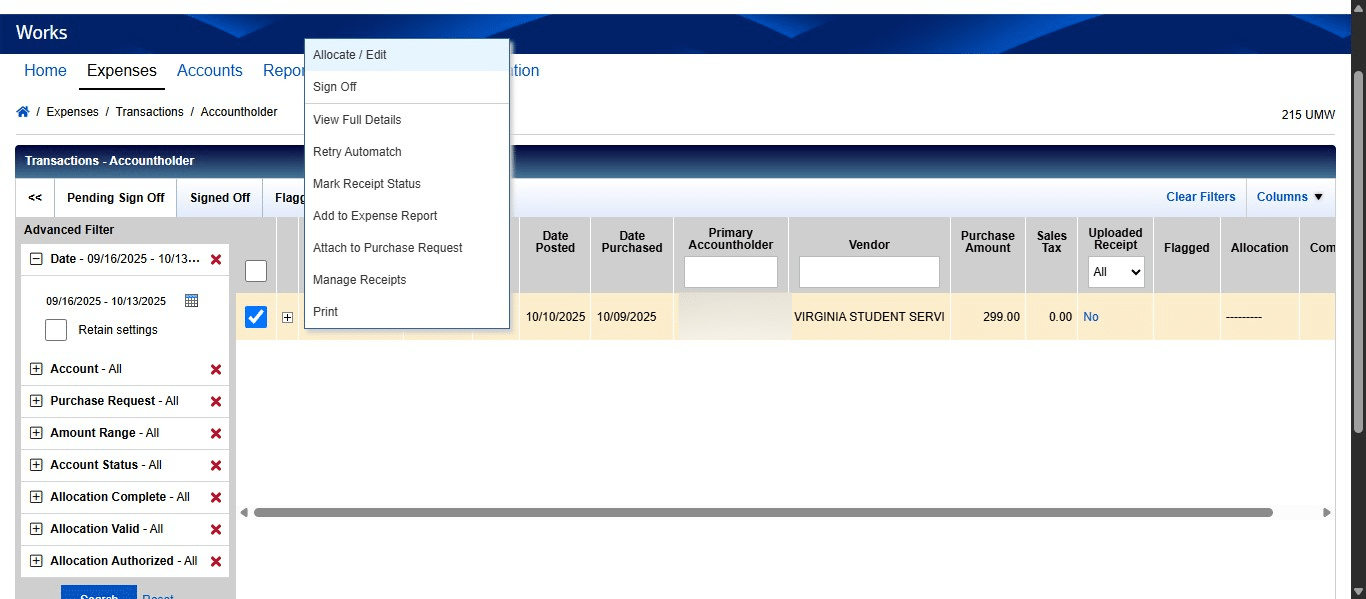
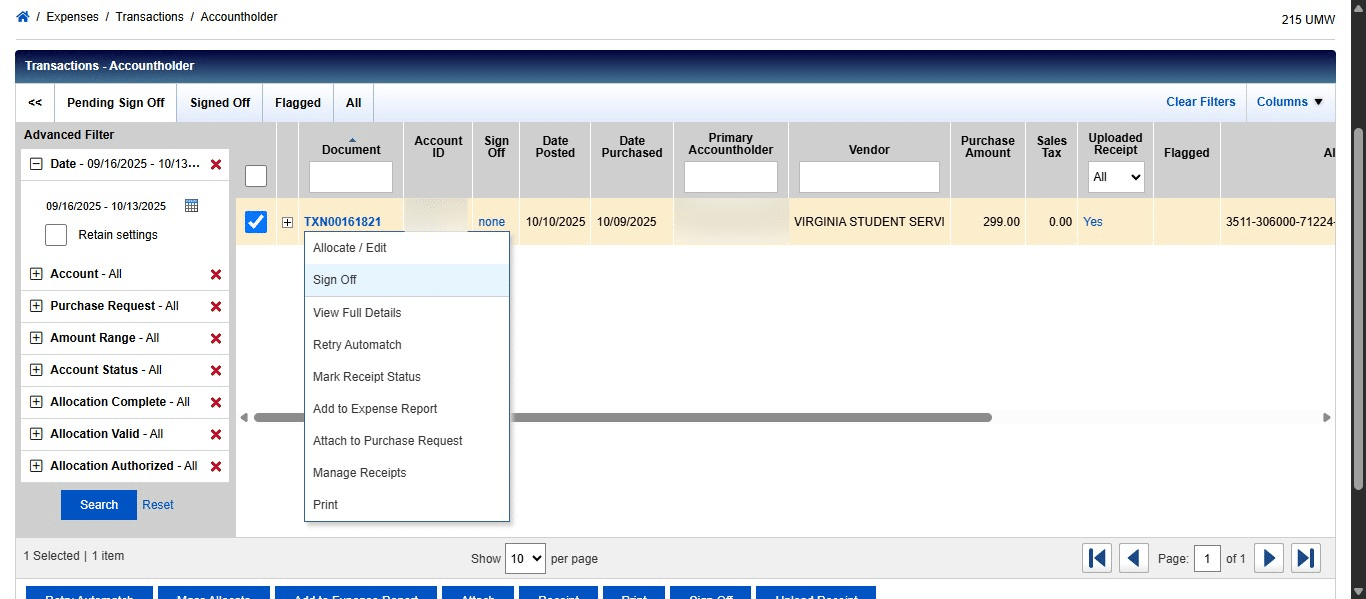
To begin the allocation, make sure that you have all of your supporting documentation available. You want to double check that the cost is correctly charged according to what you were expecting. Once all of your documentation is compiled, you can allocate your transaction by clicking the drop down on the Transaction ID under the Document column.
Click on "Allocate / Edit"
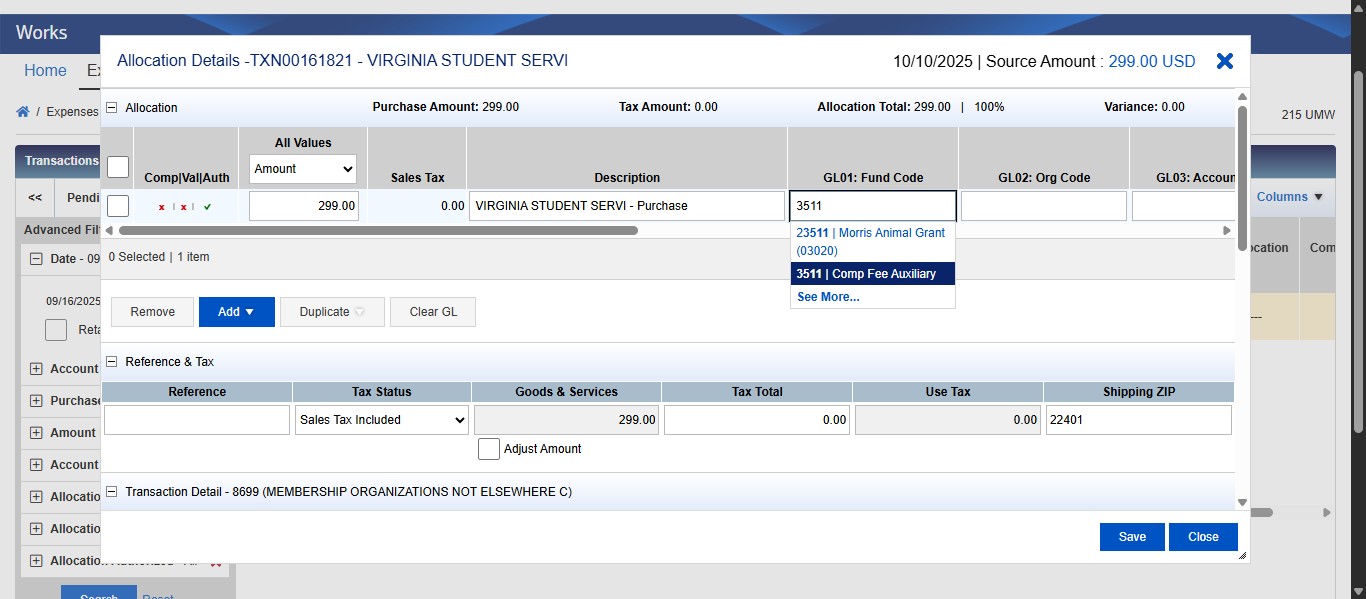
Enter the Fund Code and select it from the drop down.
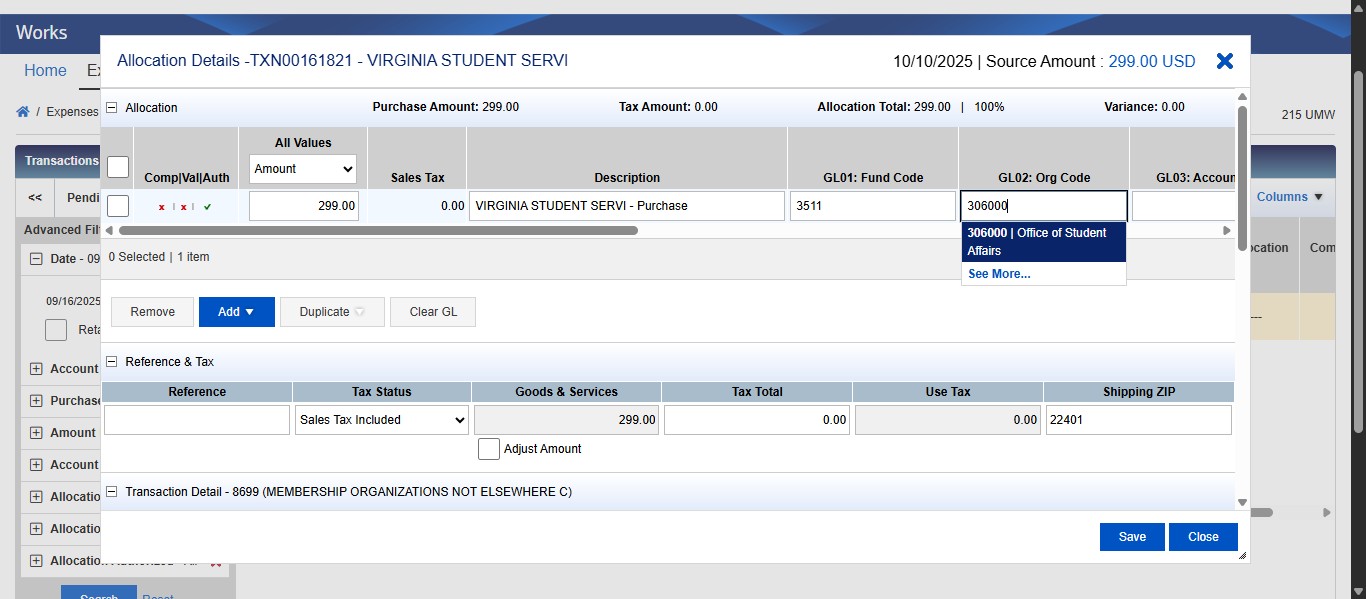
Enter the Organization Code and select it from the drop down.
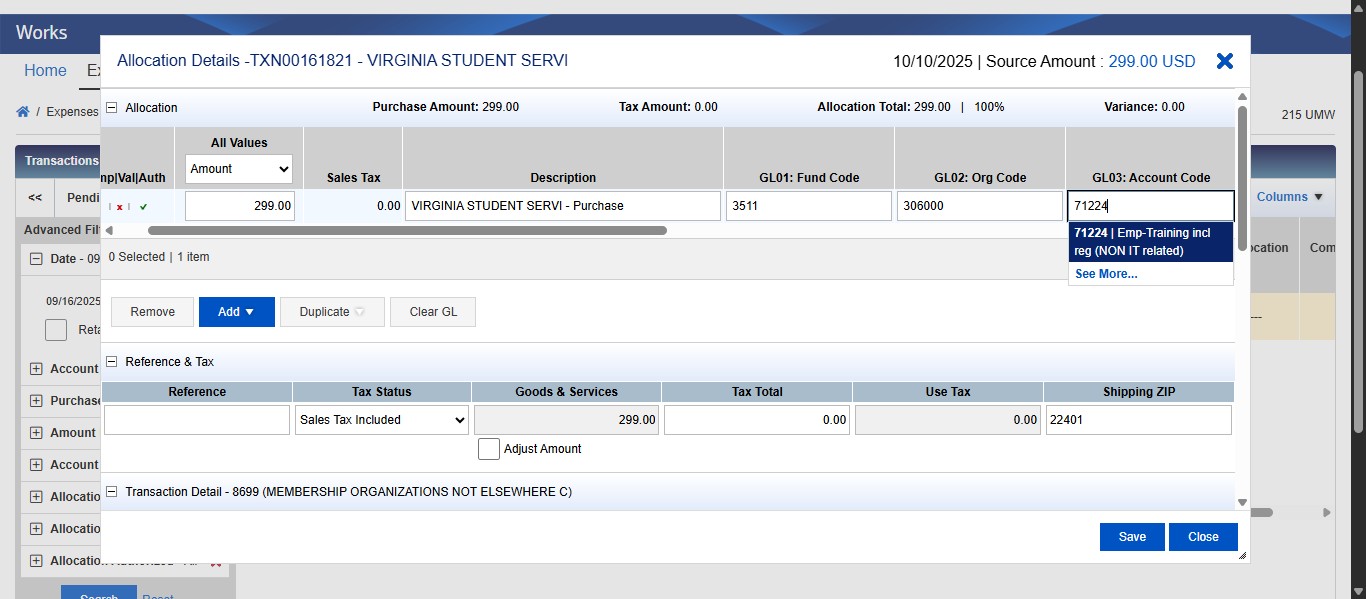
Enter the Account Code and select it from the drop down.
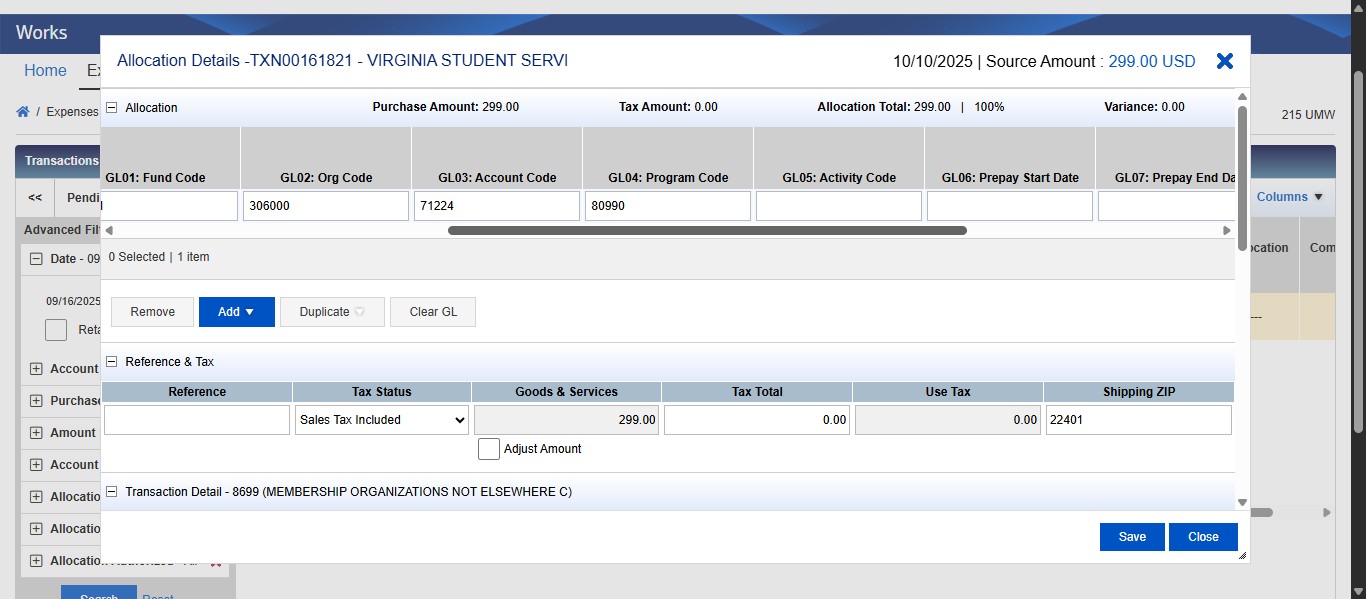
Enter the Program Code and select it from the drop down.
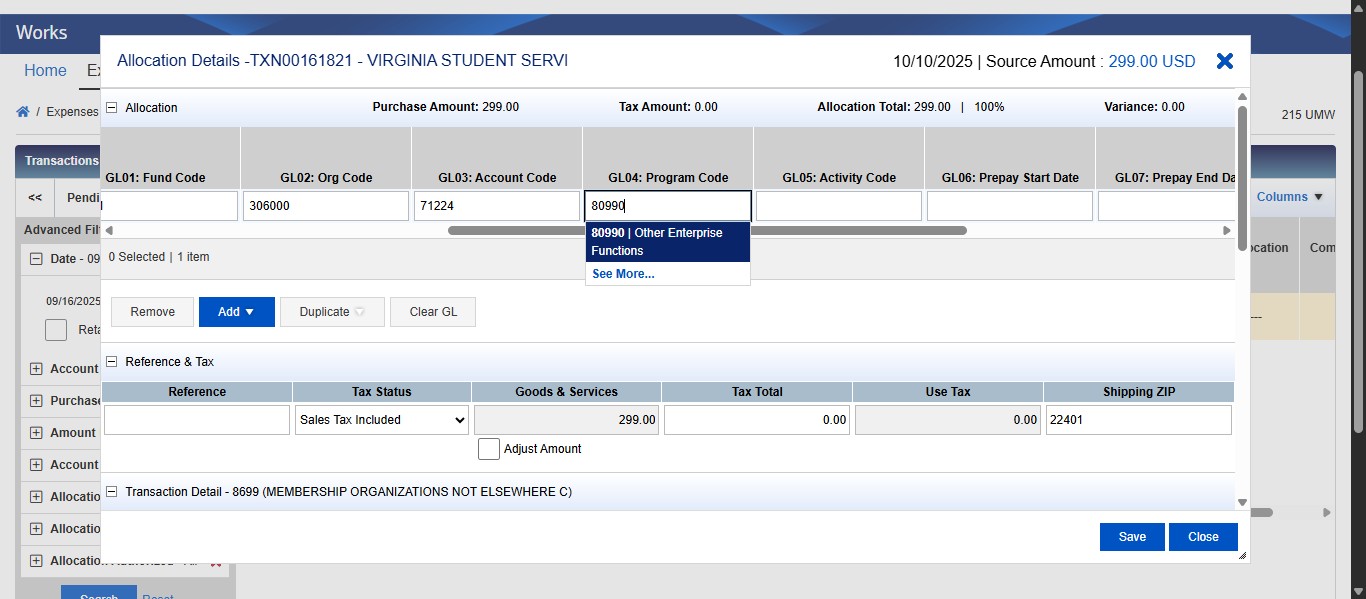
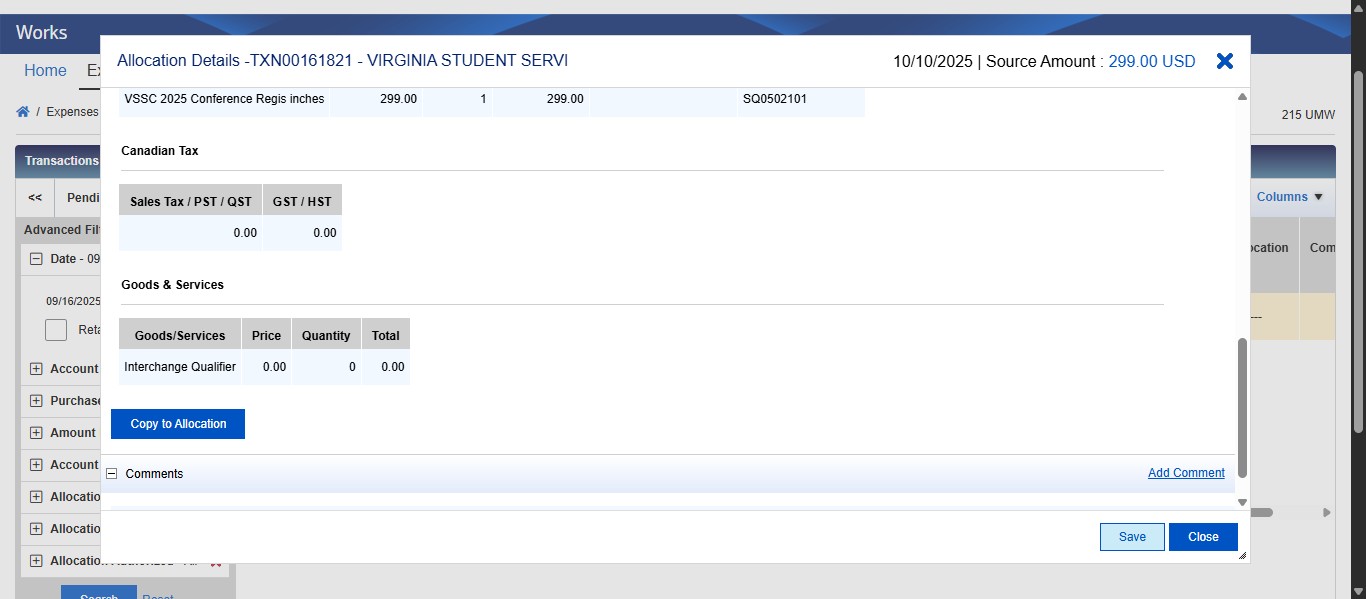
Scroll to the right to access the last two segment values. If you are purchasing a membership, software, or anything that is being pre-paid with term dates, you will also need to enter the Prepay Start and End Dates in GL06 and GL07.
Enter the information that proves you complied with the Procurement competition requirement. If it's from a vendor on contract, enter the contract number. If it's exempt from competition per the Small Purchase Procedures exemptions tables B or C, enter the SPP category code. If you purchased from a micro business, enter the micro business name or simply "purchased from micro business" or "used micro business." If none of these apply and you reached out to a micro business for a quote but did not purchase from them and you have justification for it (micro is over 5% the total cost of non-micro, OR micro business couldn't meet your needs), then enter "micro justification on file." This purchase is a conference registration which is covered by SPP Exemption C6, so I will enter SPP C6 into this segment.
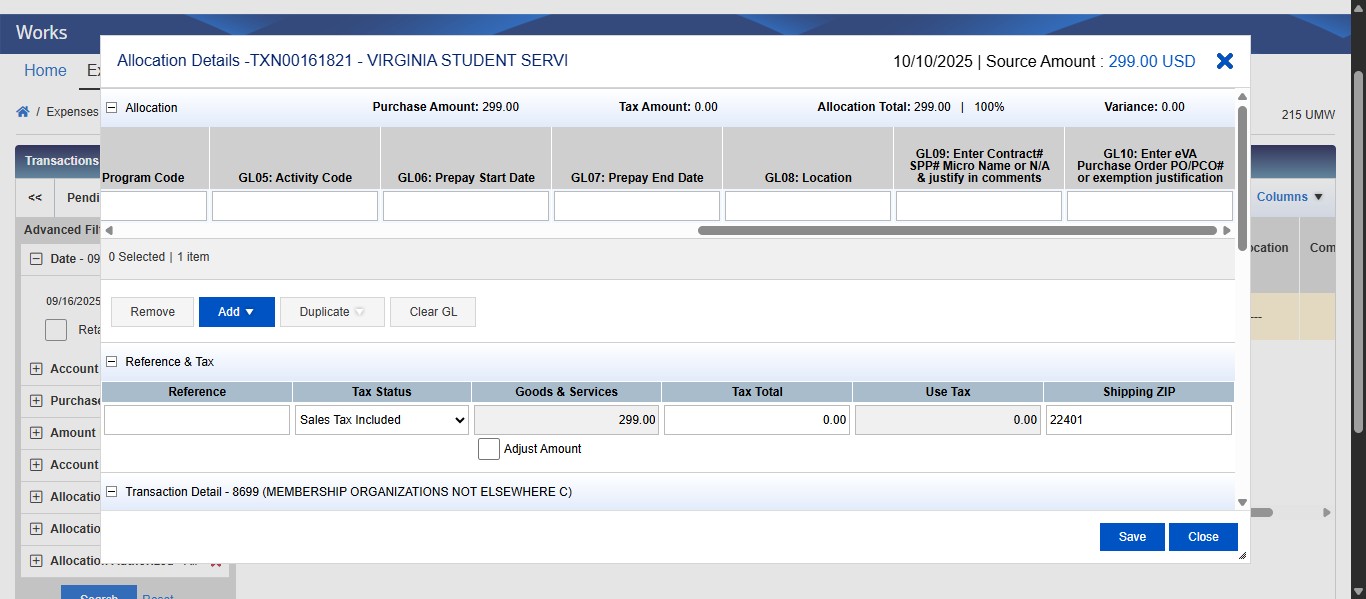
If this purchase is not exempt from needing an eVA Purchase Order per the Small Purchase Procedures Exemption Tables A or C, enter the executed purchase order number in this field (ex. PCO1234567 or PO1234567). Conference Registrations are covered by SPP C6, so I will enter SPP C6 in this field.

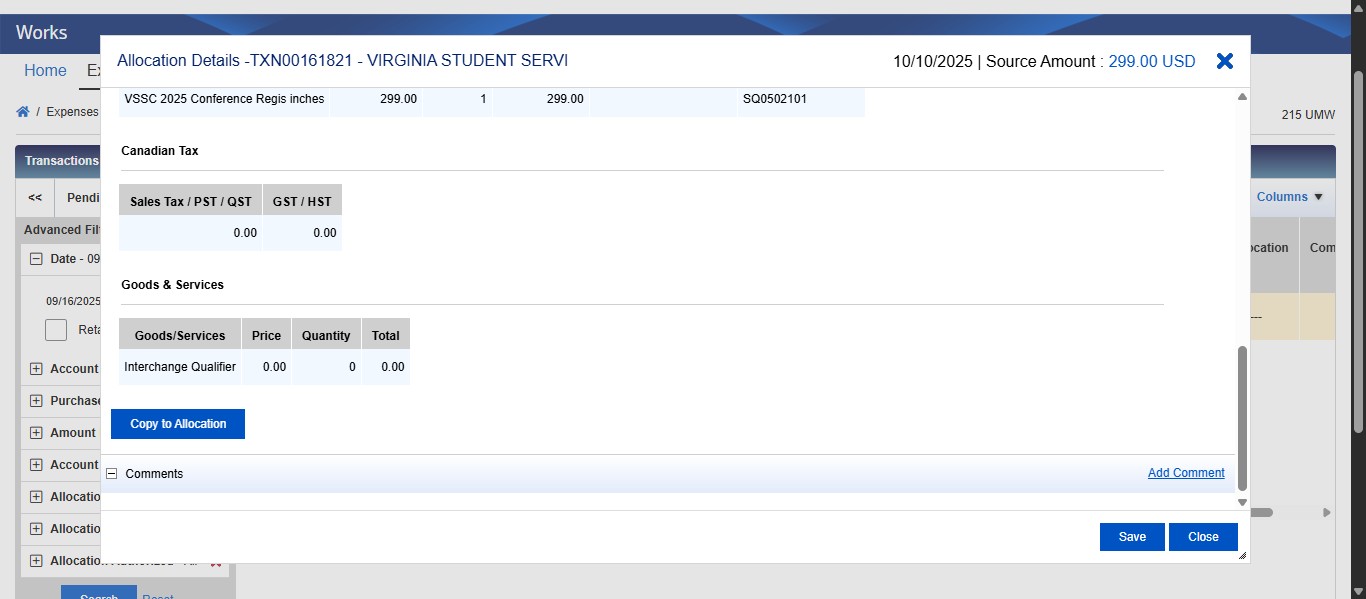
Double check to make sure no tax was applied. If tax was applied but your documentation shows no tax was applied, change the Tax Status under the Reference & Tax section to Non-taxable Purchase.

If you want to add a comment to your transaction, scroll down and click on "Add Comment" at the bottom right.
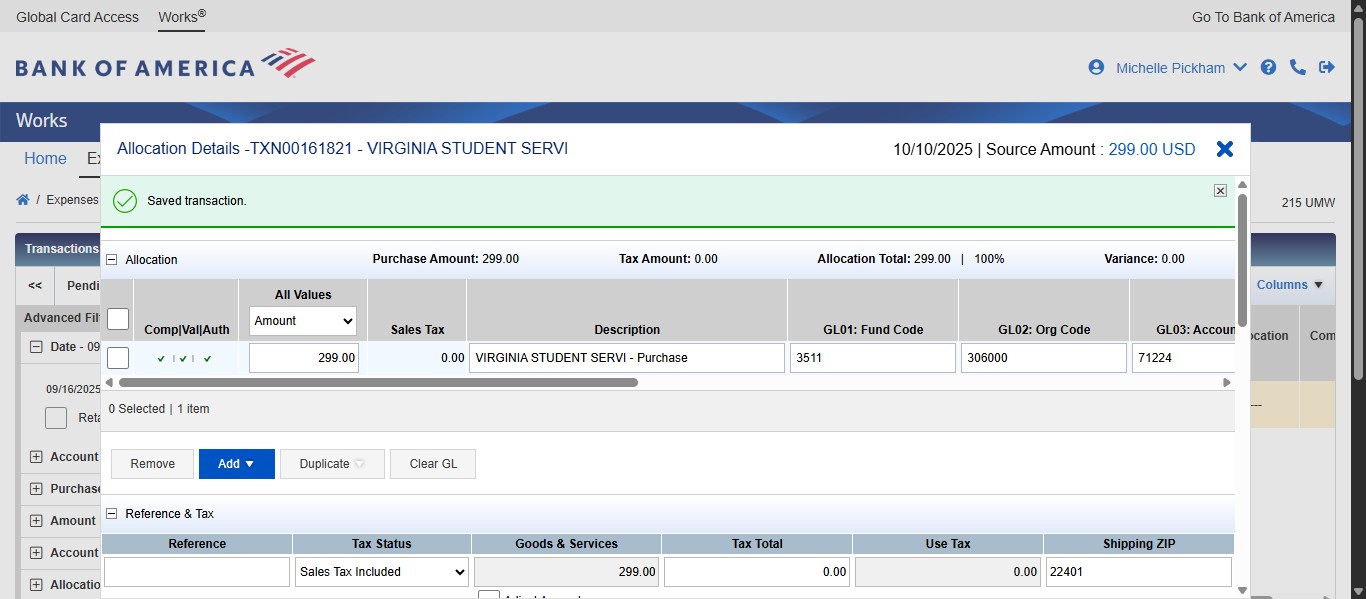
Click on "Save"
Once you save the transaction, you should have 3 GREEN check marks under the Comp|Val|Auth column. You cannot sign off on the transaction unless all check marks are green. If you have a red X under Comp that means you haven't completed all the required fields (GL01-04, GL09, GL10). If you have a red X under Val, that means your fund code and program codes are not valid combinations according to the system. Check your entries to make sure they are correct. If you have a red X under Auth, that means you haven't been authorized in the system to use the FOAP entered. Contact your Program Administrator if this happens.

Click on Close or on the X to exist out of the transaction allocation screen.
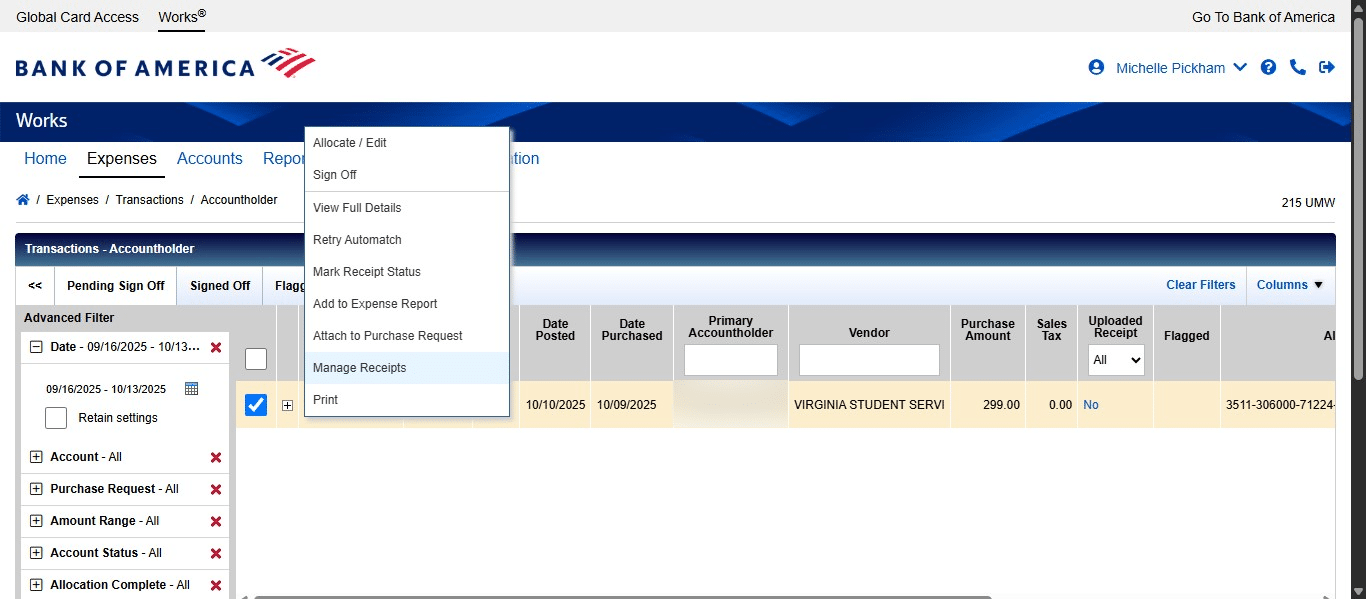
Now you need to add your required documents to the transaction. Click on the Transaction ID drop down under Document. Documents required to be uploaded per DOA are the invoice, receipt, and approval for purchase. See the Works Mandatory Document Upload website for more information on what is required.
 website for more information on what is required.](https://assets.guidejar.com/uploads/03f1795d-9016-454d-b800-153c2624e1c5/SLS2HabFEwMopArHVtEupW5fdTM2/d0226e7c-2afe-424e-a4d5-fb2ddb616058/1760363401747.jpeg)
Click on "Manage Receipts"
Click on Add
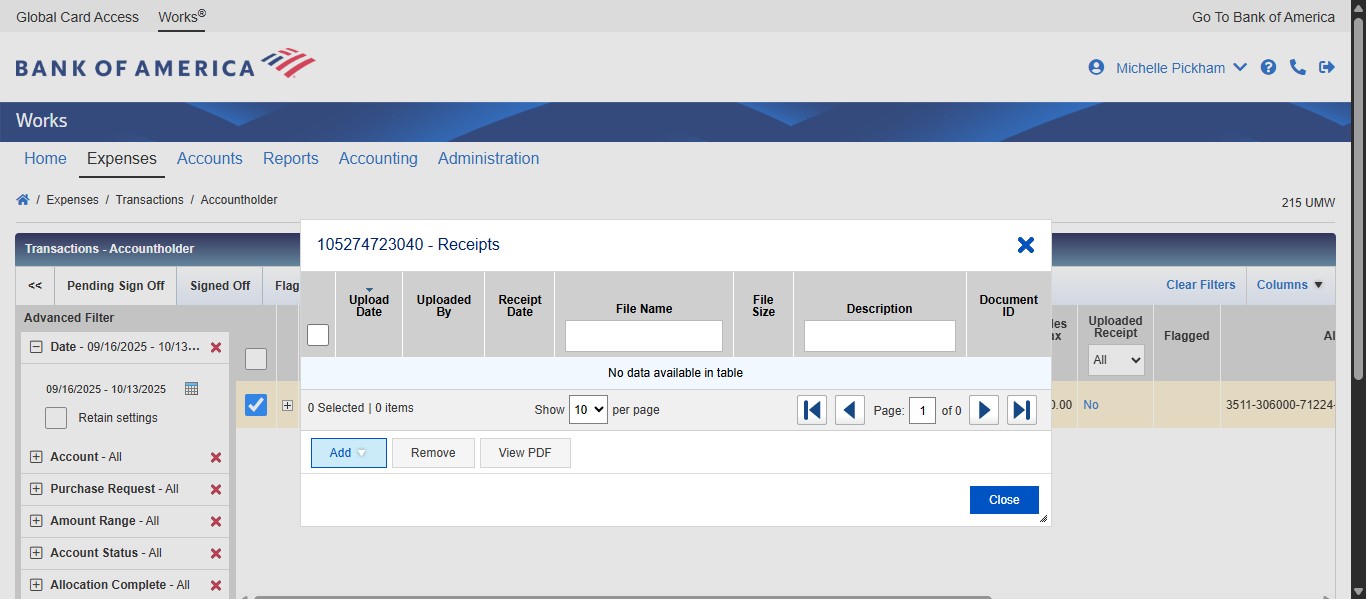
Click on New Receipt. If you don't see a pop up after that, click the icon next to New Receipt.

Select Choose File to browse for your document to upload.
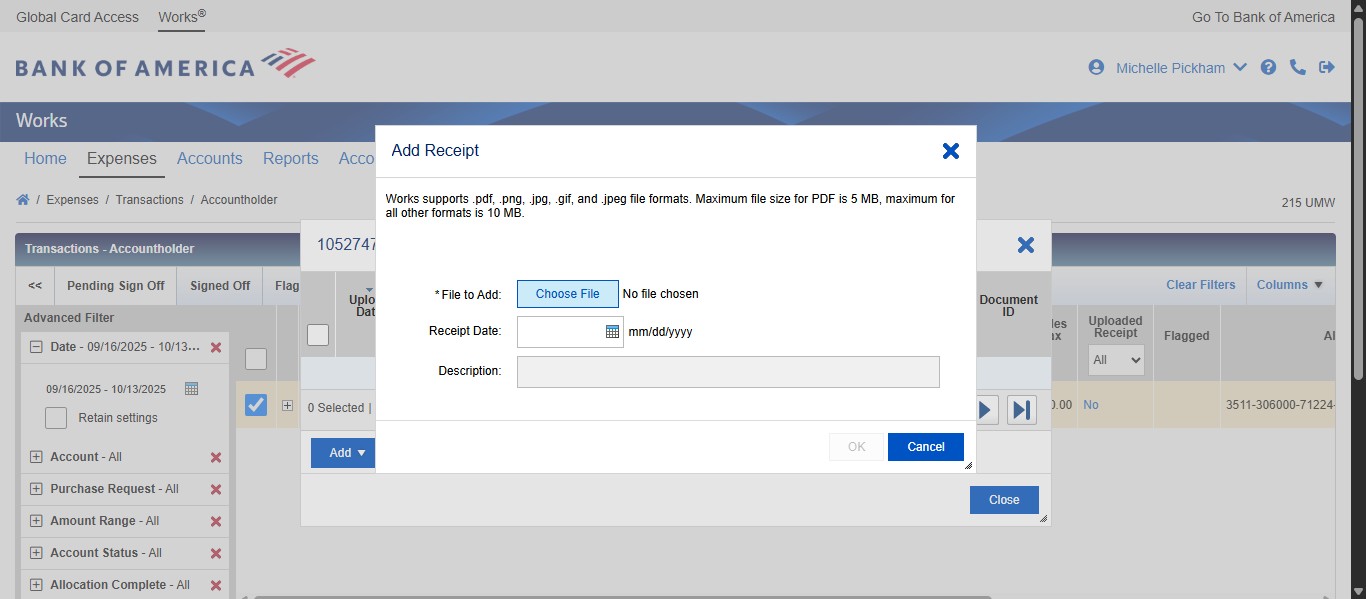
Enter a description of the file.
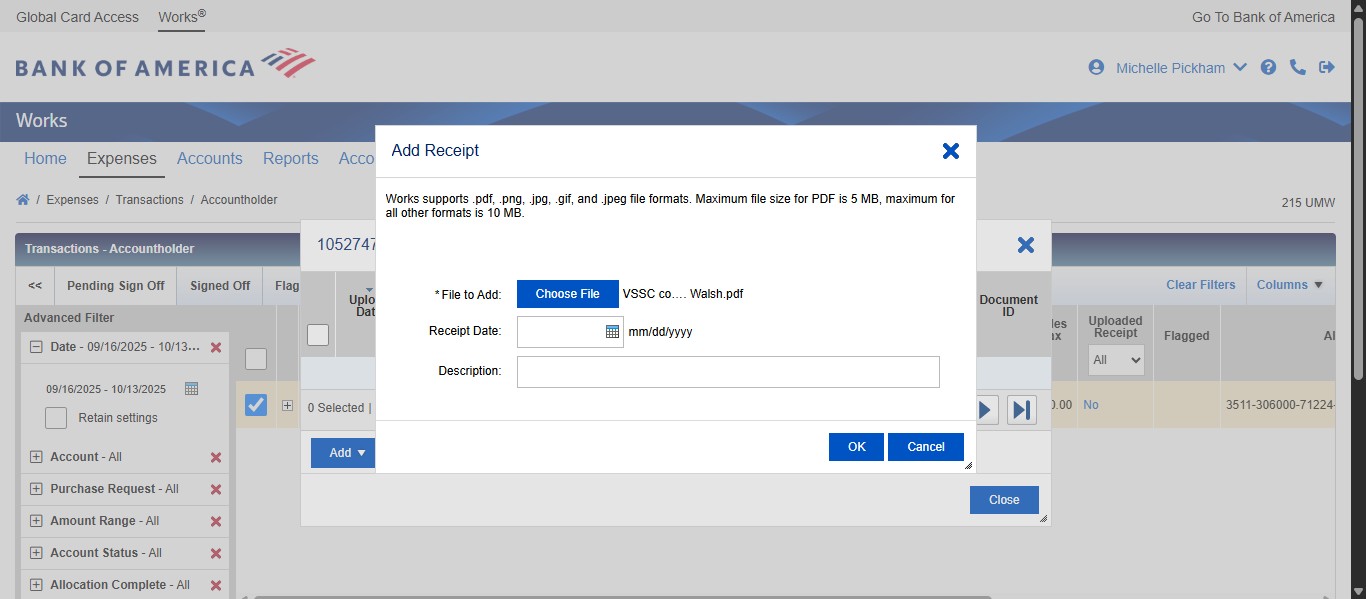
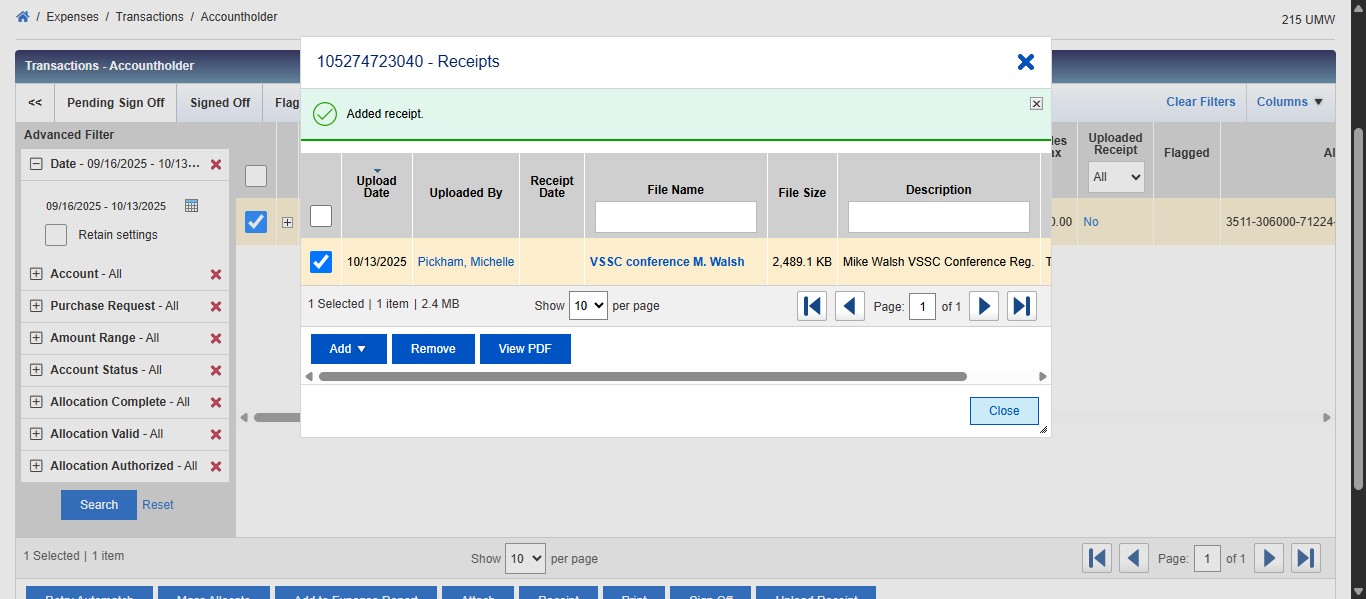
Click on "OK" to post the uploaded documents to the transaction.

Click on "Close"
Once you have allocated and added the required documentation for the transaction, you can sign off on the transaction. To do this, click on the Transaction ID drop down under Document.
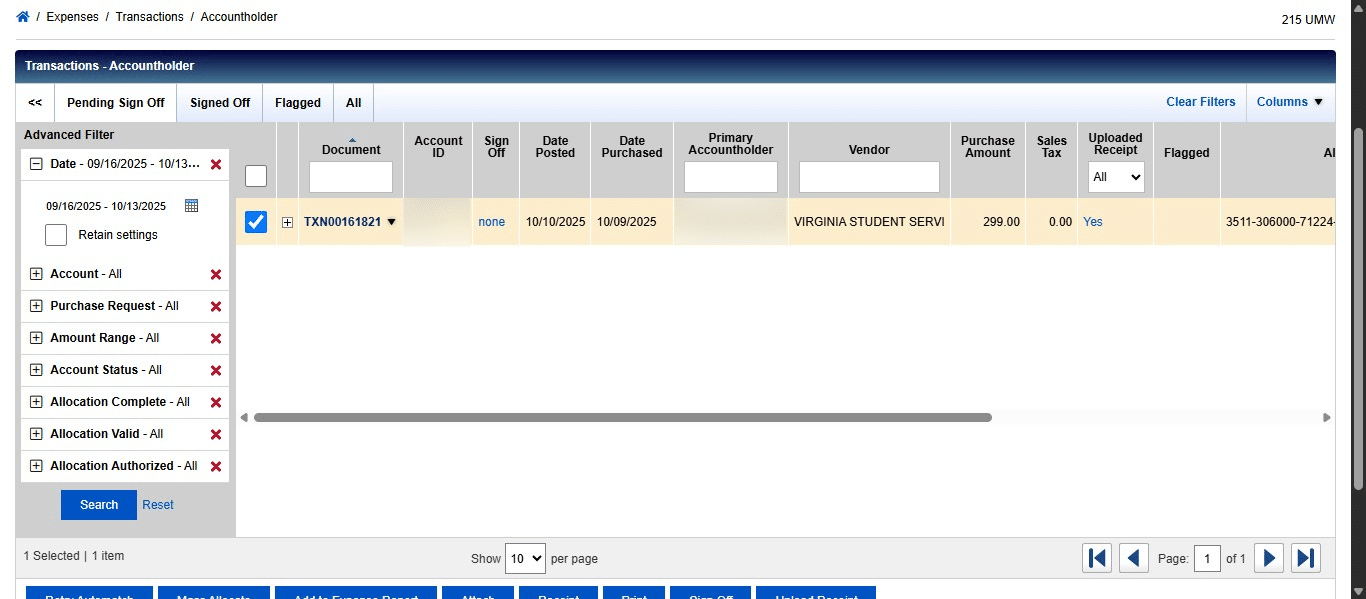
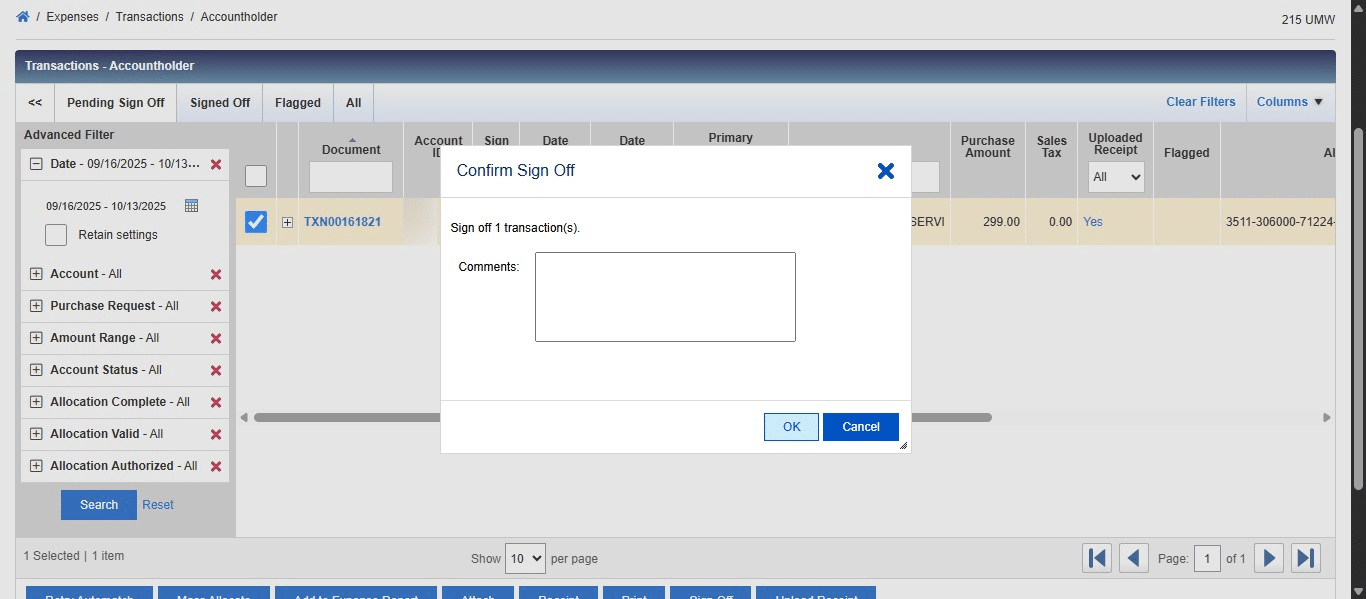
Click on "Sign Off"
Click on "OK"
Done 🚀